Multiview Correspondence
假设世界坐标系中有一个点$(X_w,Y_w,Z_w)$,首先变换到相机坐标系: \((X_c,Y_c,Z_c,1)^T=\rm{worldToCamera}\cdot(X_w,Y_w,Z_w,1)^T\) 因为这个变换只包含旋转和位移,因此齐次坐标的w部分不会改变,恒为1,也不需要做归一化,直接把矩阵乘法乘出来的齐次坐标的xyz拿过来用。
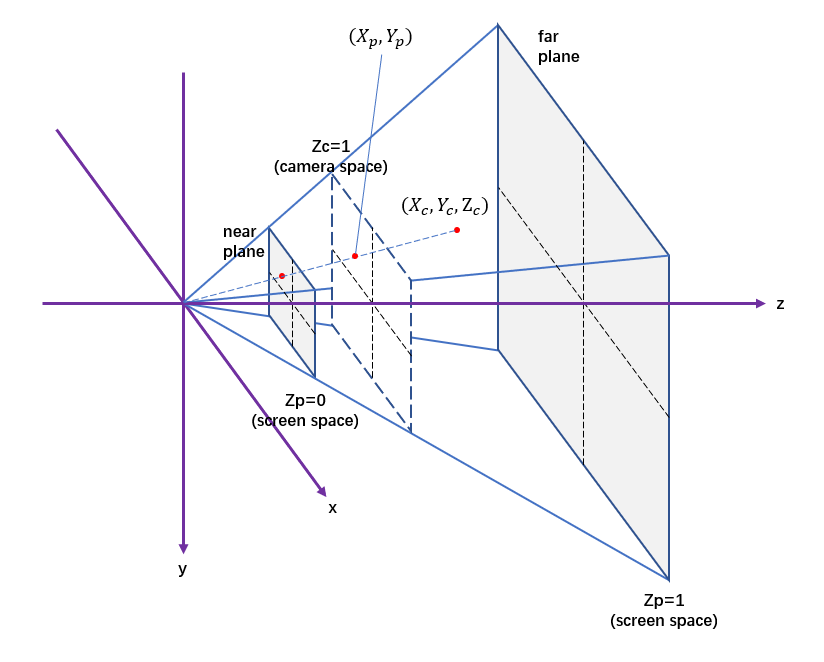
需要注意的是,Mitsuba中使用的相机坐标系的x/y轴与本文所使用的相机坐标系的x/y轴(下图中紫色的轴)相反,但都是右手系。Mitsuba的y轴与Lookat的up方向一致,而本文则是相反。本文受computer vision的影响,采用的相机坐标系的xy轴与最终图像的xy轴一致,因此在camera space到raster space的变换中不需要逆反xy轴。而Mitsuba则是将这个逆反放在了camera space到raster space的变换中。因此,区别只是在处理先后的问题。

接着进行透视变换,首先以图形学中的perspective caemra为例:
mat4 perspectiveTransform(float fov, float nearz, float farz) {
  mat4 persp{nvmath::mat4f_zero};
  float recip = 1.0f / (farz - nearz);
  /* Perform a scale so that the field of view is mapped
   * to the interval [-1, 1] */
  float ctot = 1.0 / tanf(fov * nv_to_rad * 0.5);
  persp.a00 = 1; // ctot;
  persp.a11 = 1; // ctot;
  persp.a22 = farz * recip;
  persp.a23 = -nearz * farz * recip;
  persp.a32 = 1;
  return persp;
}
可以看到ctot被注释掉,我们等会儿来讨论来讨论他的作用。
现在,原来的点被变换到齐次坐标$(X_p’,Y_p’,Z_p’,W_p’)$:
\[\begin{align}\begin{bmatrix} X_p'\\Y_p'\\Z_p'\\W_p' \end{bmatrix}=&\begin{bmatrix} 1&0&0&0\\0&1&0&0\\0&0&\rm{farz}\cdot\rm{recip}&-\rm{nearz}\cdot\rm{farz}\cdot\rm{recip}\\0&0&1&0\end{bmatrix}\cdot\begin{bmatrix} X_c\\Y_c\\Z_c\\W_c \end{bmatrix}\\=&\begin{bmatrix} X_c\\Y_c\\(Z_c-\rm{nearz})\cdot\rm{farz}\cdot recip\\Z_c\end{bmatrix}\end{align}\]因为是点的变换,所以最后出来的坐标实际上还要归一化。齐次坐标实际表示的三维空间中的点是$(X_p,Y_p,Z_p)$。
\[\begin{bmatrix} X_p\\Y_p\\Z_p \end{bmatrix}=\begin{bmatrix} X_p'/W_p'\\Y_p'/W_p'\\Z_p'/W_p' \end{bmatrix}=\begin{bmatrix} X_c/Z_c\\Y_c/Z_c\\\frac{(Z_c-\rm{nearz})\cdot\rm{farz}\cdot recip}{Z_c} \end{bmatrix}\]此时$(X_p,Y_p)$表示的是将点$(X_c,Y_c,Z_c)$投射到z=1的平面所产生的平面坐标。$Z_p$处于0和1之间,对应的是nearz和farz。
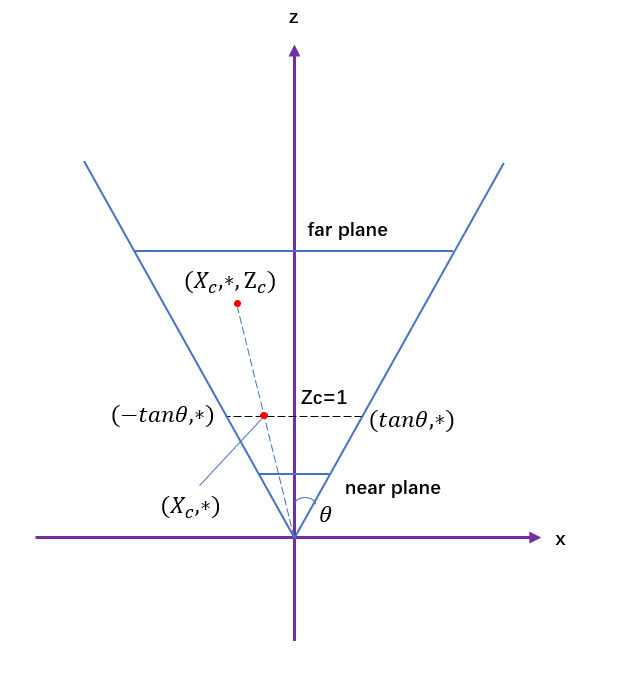
好,现在我们知道$(X_p,Y_p)$表示的是z=1平面上的坐标,根据fov (field of view,假设为$2\theta$),我们就可以算出z=1平面上有效的窗口范围(clip window)。

可以看到此时$X_p$的范围是$(-\rm{tan}\theta,\rm{tan}\theta)$。这里可以回想一下我们刚才把ctot注释掉了,如果考虑上ctot,那就是对x和y都做了一个 1/tan$\theta$ 的缩放,使得$X_p$的范围是$(-1,1)$。然后我们再考虑$Y_p$的范围。假设宽高比是aspect,高宽比是invAspect,则$Y_p$的范围是$(-\rm{invAspect,invAspect})$。
然后再来看相机空间到光栅化空间的变换:
mat4 cameraToRasterTransform(VkExtent2D filmSize, float fov, float near,
                             float far) {
  float aspect = filmSize.width / float(filmSize.height);
  float invAspect = 1.f / aspect;
  // This gives a transformation from camera space to screen space.
  // In x this space ranges from -1 to 1 but y ranges from -invAspect
  // to invAspect, since aspect ratio is not taken into account.
  mat4 cameraToScreen = perspectiveTransform(fov, near, far);
  // x and y ranges from (-1,1) x (-1,1)
  cameraToScreen = nvmath::scale_mat4(vec3(1.f, aspect, 1.f)) * cameraToScreen;
  // x and y ranges from (0,2) x (0,2)
  cameraToScreen =
      nvmath::translation_mat4(vec3(1.f, 1.f, 0.f)) * cameraToScreen;
  // x and y ranges from (0,1) x (0,1)
  mat4 cameraToNdc =
      nvmath::scale_mat4(vec3(0.5f, 0.5f, 1.f)) * cameraToScreen;
  // x and y ranges from (0,0) to (width,height)
  mat4 cameraToRaster =
      nvmath::scale_mat4(vec3(filmSize.width, filmSize.height, 1.f)) *
      cameraToNdc;
  return cameraToRaster;
}
cameraToScreen就是我们之前讲的变换。之后我们将screen space变换到raster space:首先都缩放到$(-1,1)$也就是ndc空间,紧接着在y方向上平移了1,在x方式上平移了1,然后进行了一个缩放;ndc space和screen space没啥区别,唯一的区别就是,ndc空间的xy范围都是-1到1。
ndc到raster空间的变化如图所示。

现在总算知道之前写Asuna渲染器的时候怪在哪儿了。Asuna(当前版本)里面,Loader载入的shot中的up向量,用它来算Lookat的时候,产生的worldToCamera变换会使得相机的y轴和up重合。这其实也挺合理的,因为从相机最后拍摄得到的图像来看,up就是上面嘛~哪有说y和up是反着的。但是vision那边,相机的y轴和图像的y轴重合,指向地面orz,怪不得之前怎么写怎么不对劲呢。
那想清楚了之后怎么设计才会比较优雅呢?现在比较麻的一点是因为要用现有的view更新框架(这样gui操作比较方便),perspective camera中直接套用了nvpro_core的camera,但是这个camera space的y是和up重合的,x指向右侧,z指向backward。
好像也挺简单的,就是把y和z的方向都反一下,就变成我第一幅图中所画的相机坐标系了。
  mat4 getView() {
    return nvmath::scale_mat4(vec3(1.f, -1.f, -1.f)) * CameraManip.getMatrix();
  }
然后现在还有个怎么都写不对的两相机correspondence。基本的思路就是:
- 目标是寻找reference view中某个pixel在source view中的对应
- 思路:
- 从reference pixel射出射线与场景相交于点p
- 检查点p到source camera的射线是否会被遮挡
- 如果被遮挡就说明在source view中看不到该点
- 没被遮挡就运用worldToRaster找到source view中的对应像素
我怎么想都觉得思路肯定没错,明天再看看吧(写于2022/6/18
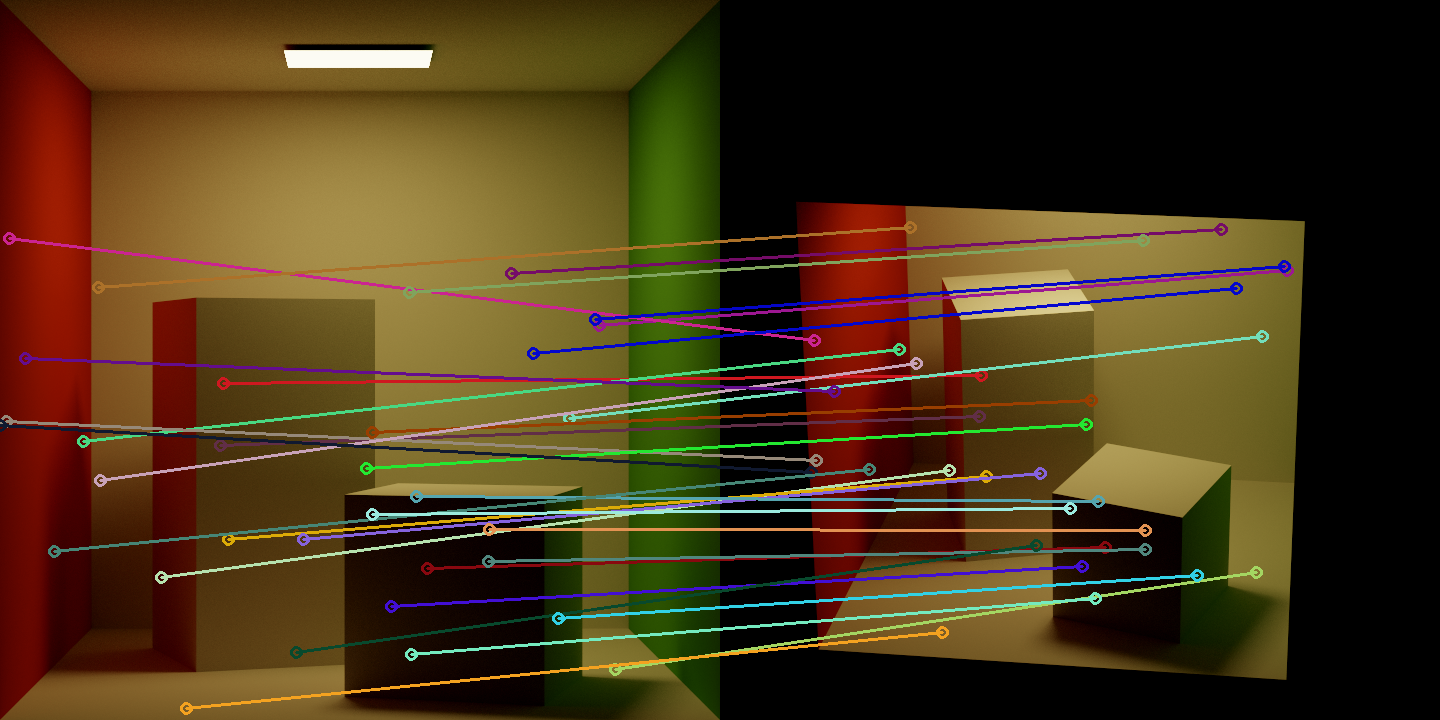
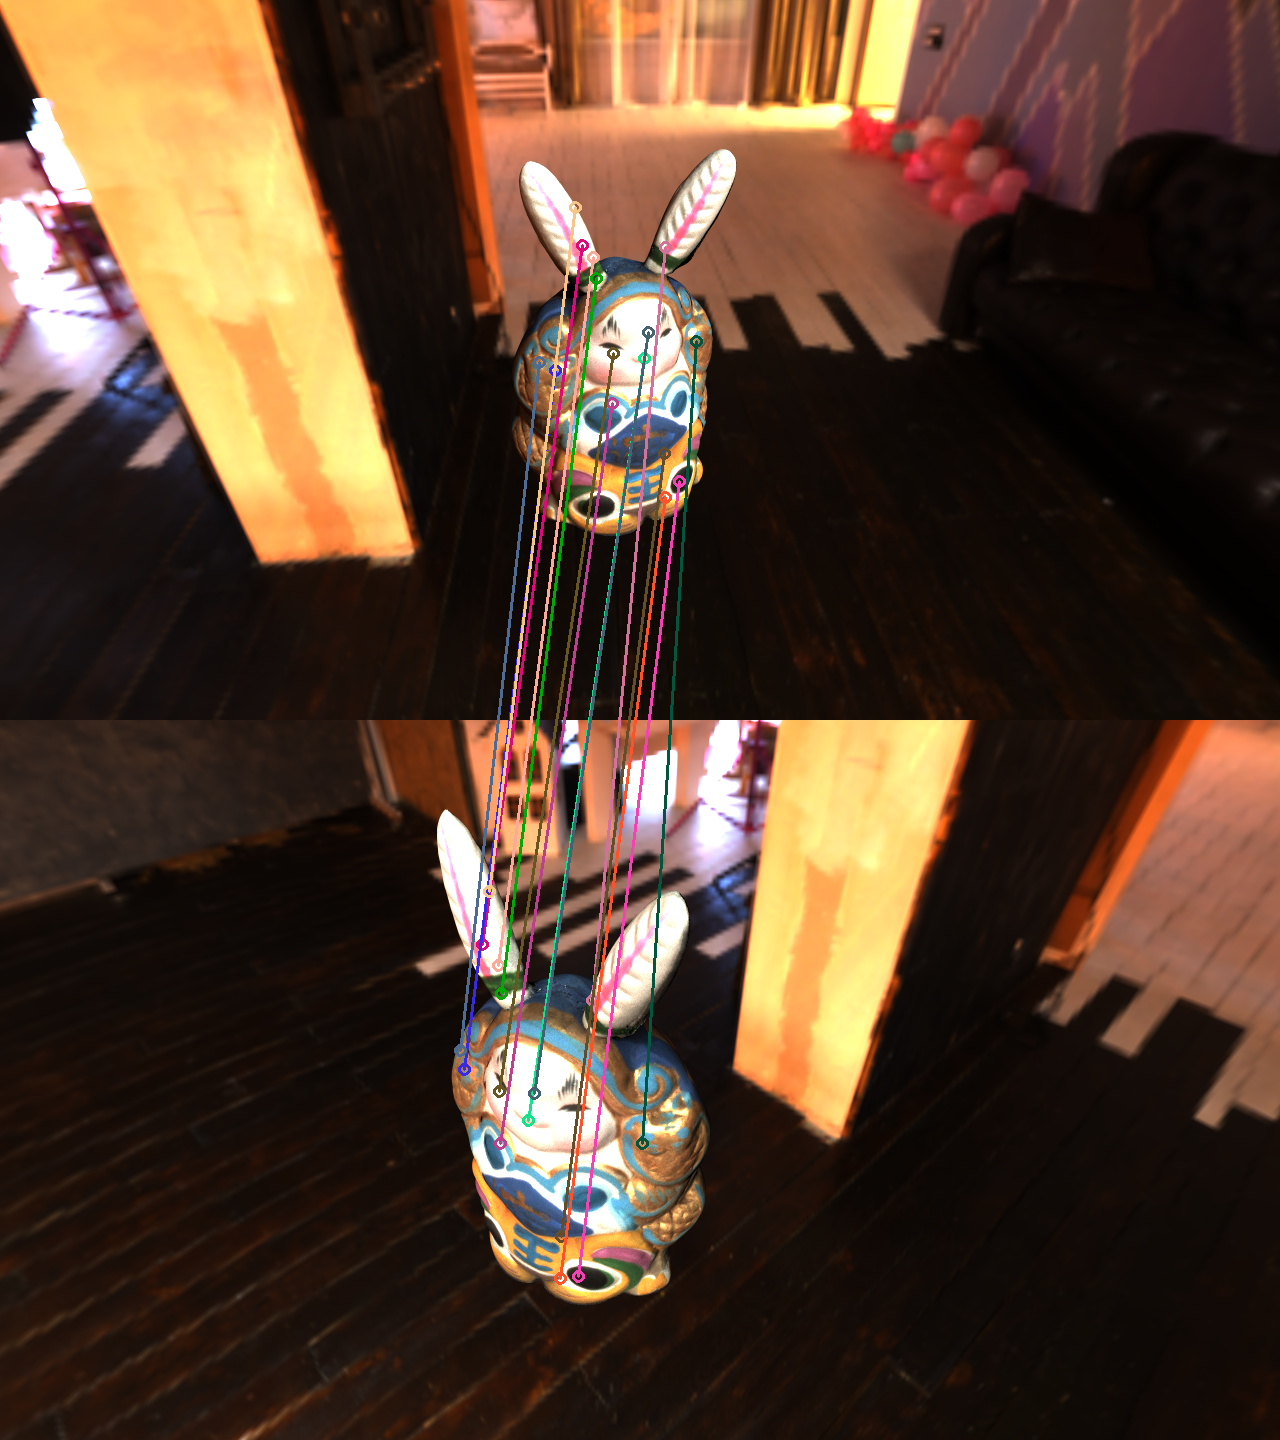
擦,今天(2022/6/19)终于发现错在哪儿了。一路下来到生成对应像素的flow、存到图片都没有错。错的是,可视化的时候,用的是opencv读flow,会把RGB channel反一下,导致了我flow valid(我存在B通道,结果用了R通道)判断错误。正确的结果如下:

